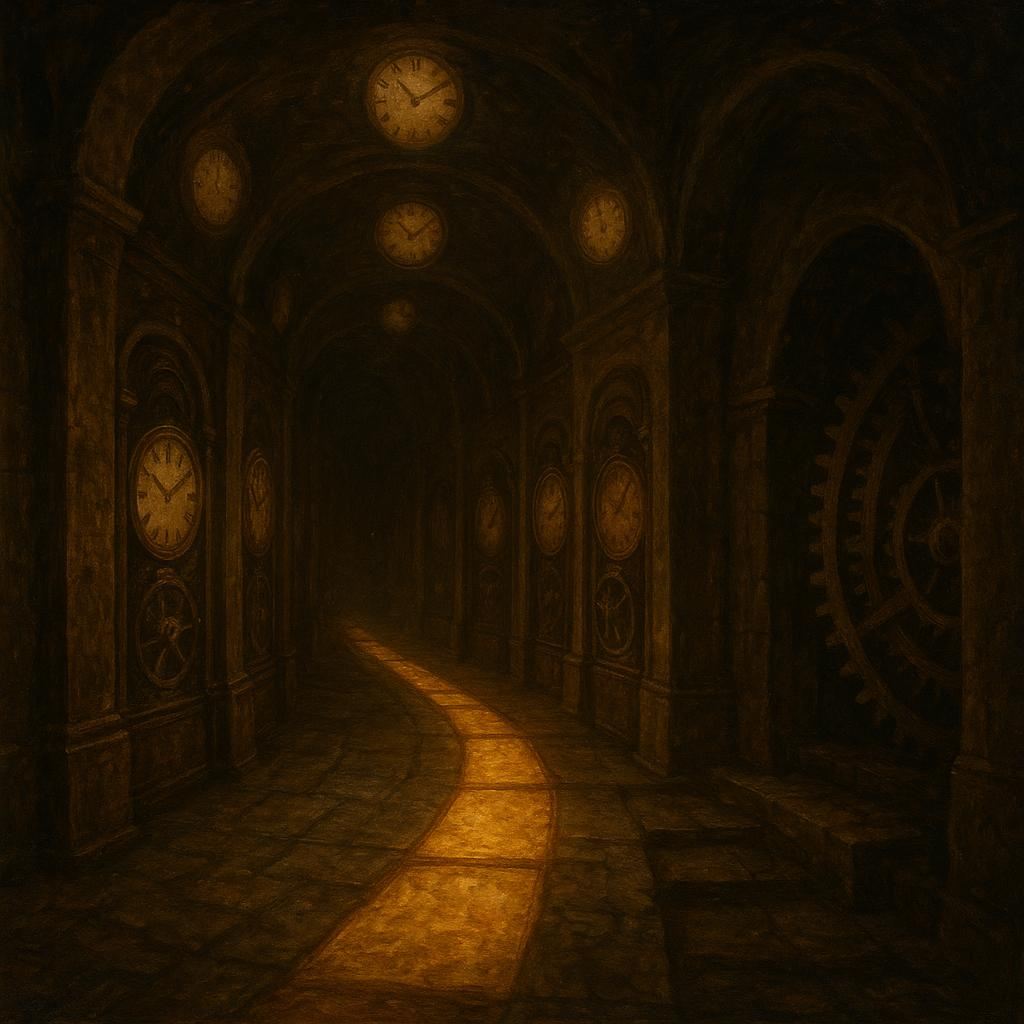

Cadence of the Amber Clockwork Corridor
Complexity: Complex
Type: Mechanical (with magical, time-related flavor)
Severity: Dangerous
Trigger: Intruders enter the corridor and step onto the glowing floor; wall panels rotate on a cadence roughly every 3 rounds.
Effect: Wall rotation; floor glow path shifts; floor hazard pulses; optional knockback/secondary effects; static safe path when disarmed
Damage Output: 2d6 bludgeoning damage on a failed Dex save (DC 15 to halve) (Bludgeoning)
Detection DC: Perception DC 13–15; Investigation DC 15–17; Passive Perception 13–15
Disarm DC: DC 20 Sleight of Hand or Thieves’ Tools; DC 18–20 Arcana or Investigation; DC 20 per alcove if multiple alcoves used
The Amber Clockwork Corridor is a long, sunless tube of worked stone bathed in a warm amber glow. Bronze clock alcoves march along the walls, each holding a visible gear that subtly turns in place, as if the wall itself breathes. Overhead, a choir of ceiling clocks keeps time with a relentless tick-tock, their hands glinting as if they were tiny daggers of metal. The floor bears a central groove that pulses with the rhythm of the space, acting as a timekeeper and a conduit for the amber glow on the floor. A glowing path crawls along the floor, marking the safest route—yet the path shifts whenever the walls rotate, bending as if the corridor itself is sighing and reconfiguring its bones. When the walls shift, sections slide with a muted grind, sometimes nudging explorers toward hazardous tiles that slide open to reveal a lower gear chamber beneath.
As rounds pass, the glow intensifies in cooperation with the ceiling clocks, and the corridor’s atmosphere thickens with the sense of mechanical life. The alcoves emit a faint resonance when approached, hinting at a hidden mechanism beneath the clockwork surface. The space feels both ancient and alive—an archipelago of gears and amber light where fate is literally measured in seconds.
Amber Clockwork Corridor – Gameplay Notes for the DM
Summary at a glance
- Type: Mechanical trap with magical flavor
- Scale: Complex, multi-round, initiative-based
- Theme: A living clockwork corridor. Walls rotate every 3 rounds; a glowing floor path marks the safe route. Off-path tiles risk a floor hazard when stepped on; rotations realign the path and can push players toward hazards.
- Activation/Cadence: The rotating wall panels operate on a strict 3-round cadence. Initial layout is layout A; rotations occur at the start of rounds 3, 6, and 9 (and continue if not disarmed).
- Detection: Clues include ticking ceiling clocks, shifting amber glow, and a glow path that realigns just before a rotation. Subtle drafts and engravings in alcoves hint at timing.
- Disarm: Three bronze clock alcoves hide the control mechanisms. Disarming requires careful checks (see below). If three alcoves are disabled, rotation stops for 1 hour.
- Hazard: Off-path steps trigger a floor hazard pulse dealing 2d6 bludgeoning (Dex save DC 15 to halve). Optional knockback / prone effects on failed saves.
Core stats you’ll want handy
- Hazard: 2d6 bludgeoning on failed Dex save (DC 15; half on success)
- Safety path: The glowing path on the floor is the only safe route; stepping off becomes risky when rotations occur
- Rotation cadence: Every 3 rounds (start of rounds 3, 6, 9)
- Disarm checks (per alcove):
- Thieves’ Tools (Dex) or Sleight of Hand (Dex): DC 20
- Arcana or Investigation (Int): DC 18–20 (to identify and counter-timing)
- If three alcoves are engaged successfully (DC 20 each): rotation disabled for 1 hour
- Detection DCs (reference):
- Perception DC 13–15 to notice glow path and ticking
- Investigation DC 15–17 to notice clock alcoves and tracks
- Passive Perception 13–15 can notice the glow shifting near rotation points
Activation and sequence overview
- Trigger and start: The corridor’s mechanism runs continuously the moment the party enters (or when the door to the corridor is opened). The first rotation occurs at the start of Round 3; three rotations constitute a full cycle unless disarmed earlier.
- Layouts: The corridor has layout A (initial), then layouts B and C as the walls rotate. The glow path shifts with each rotation; some segments may momentarily vanish or bend.
- Safe path vs hazards: The glowing floor path remains the safe route, but it can be realigned and even briefly obscured during rotations. If a character ends a movement on a non-glow tile after rotation, they risk stepping onto a hazard tile.
- Environmental cues:
- Amber glow intensifies as a new phase nears
- Ceiling clocks tick in sync; a distant chime or two may hint at the current layout
- Bronze alcoves contain “clockwork keys” that shimmer with the correct orientation when approached
Detection and disarm notes (what players can learn or try)
- Detection clues for players:
- Subtle ticking from ceiling clocks; glow path pulses slightly in time with rotations
- Amber glow intensifies or shifts at the edge of a rotation
- Floor glow appears to realign just before rotations
- Bronze clock alcoves’ engravings glow faintly when the panel orientation is near the correct position
- Useful skill checks (suggested DCs):
- Perception 13–15 or Investigation 15–17 to spot the rotation cadence and glow-path shifts
- Passive Perception 13–15 can notice glow-path shifts as a rotation nears
- Arcana or Investigation 18–20 to infer a time-based mechanism and plan counter-timing
- Disarming in-character:
- Approach an alcove and work the clockwork with Thieves’ Tools or Sleight of Hand (DC 20)
- Alternatively use Arcana or Investigation (DC 18–20) to determine how the timing mechanism can be counter-timed
- If three alcoves are aligned correctly (DC 20 each), rotations are locked for 1 hour
- Bypassing without disarming:
- Strictly follow the glowing path; if you’re confident in timing and spacing, you can pass through each rotation without triggering hazards
- If a rotation is imminent and a character cannot reach an alcove in time, rely on cautious movement to stay on current glow-path segments
Suggested tactics and variations (DM guidance)
- Tactics for increasing challenge:
- Use the glow-path flicker or partial occlusion to force risky moves off the path
- On rotation rounds, briefly increase the chance of knockback for characters near walls (simulate the force of shifting panels)
- Place a few hazard tiles near the ideal glow-path to reward careful timing and positioning
- The party’s rogue/artificer may be able to intervene pre-rotation by suspecting a timer and trying to disable rotation early
- Targeting and dynamic behavior:
- Focus rotations to pressure the party’s intended path; rotate sections that would push a character toward hazards if they linger on the wrong tile
- If a PC is grappling or carrying a load, consider slightly increasing the chance of being pushed or losing their footing on a non-glow tile
- Difficulty adjustments by party level:
- For higher difficulty, increase hazard damage to 3d6 or add a secondary effect (e.g., a brief slowed movement on a failed Dex save)
- For easier play, reduce DCs by 1–2 or allow a single attempt per alcove to disengage (instead of three separate checks)
Initiative and round actions (what the trap does on its turns)
- Trap initiative and stance:
- Trap initiative bonus: +7 (mechanical precision). It rolls initiative at the start of the encounter and acts on its own turns thereafter.
- On its turn, the trap performs one or more of these actions in a sequence, typically aligning to the rotation cycle.
- Turn-by-turn actions (typical round flow)
- When a rotation is due (start of rounds 3, 6, 9):
- Rotate Wall Panels: A section of the corridor slides or hinges to a new position, reconfiguring the layout (A → B → C → A, in sequence depending on the rotation). The glowing path shifts accordingly.
- Glow Path Update: The safe path indicator re-illuminates to reflect the new path. Some segments may momentarily flicker or vanish during the rotation.
- Hazard Engine: Any PC standing on a non-glow tile at the moment of rotation is pushed 5–10 feet (forced movement) and, if they end their movement on a non-glow hazard tile, must make a Dex save (DC 15) or trigger the floor hazard pulse.
- Hazard Pulse: If a PC fails the Dex save, they take 2d6 bludgeoning damage (halve on success). A failed save might also cause additional flavor effects (e.g., knocked prone, or a brief 1-round penalty to speed ifDM chooses).
- Optional push/knockback: If a PC is on the edge of a shifting wall, they can be knocked back by 5–10 feet, possibly into a hazard area or off their feet (consider prone on failed saves).
- Between rotations (non-rotation rounds, e.g., rounds 1–2, 4–5, 7–8):
- Ambience and cues: The walls “settle,” the glow path remains lit, and ceiling clocks tick steadily. No hazard triggers unless someone steps off the glow path or attempts to move through a newly exposed hazard zone.
- Clue update: If a PC spends time observing, they may gain advantage on the next perception/investigation check to anticipate the cadence (DM’s discretion).
- When a rotation is due (start of rounds 3, 6, 9):
- Round-by-round progression example
- Phase (Rounds 1–2): Idle phase. Glow path is visible; no hazard unless someone leaves the path.
- Rotation 1 (Round 3 start): Walls rotate to layout B; glow path realigns; hazard tiles move; any off-path PC on a hazard tile makes a Dex save (DC 15) if moved onto the hazard. Safe path brightens where it now lies.
- Phase (Rounds 4–5): Layout stabilizes on B; glow path continues; no automatic hazard unless players step off.
- Rotation 2 (Round 6 start): Walls rotate to layout C; glow path realigns again; hazard check as above.
- Phase (Rounds 7–8): Layout stabilizes on C; glow path active.
- Rotation 3 (Round 9 start): Final rotation back to or through an alternate arrangement; glow path realigns; hazard checks again.
- End condition (post-Round 9 or if disarmed):
- If disarmed: corridor becomes static and safe; glow path remains and no more rotations occur for 1 hour (or until tampered with again).
- If not disarmed: cycle ends, walls resume standard cadence and hazard remains possible on future attempts as designed (per DM’s discretion to continue or reset).
End-state and aftermath
- If players disarm the mechanism (three alcoves aligned for 1 hour): the corridor stabilizes into a static, safe path with continuous glow; no rotations occur during that hour unless tampered with.
- If not disarmed: the trap completes its three-rotation cycle; the corridor continues to operate on cadence, with the potential for future cycles if players linger or re-enter. You may reuse the same sequence with a refreshed glow path and a new set of clues.
Tips for running this smoothly
- Track the cadence clearly: Use a simple note or a whiteboard to mark rounds, rotation rounds (3, 6, 9), and current layout (A, B, C). Update the map as the glow path shifts.
- Map and token setup: Have a clear map with three distinct corridor layouts (A, B, C). Mark the glow path on the map with a bright overlay or a glow-in-the-dark token that you can rotate or shift as the walls move.
- Clue management: Provide players with consistent cues:
- A faint draft when a wall is about to shift
- Amber glow intensifying or flickering near the rotation
- A clock-like chime cue from the ceiling clocks on rotation rounds
- Disarm pacing: Allow multiple players to participate in disarm attempts, ideally one per alcove. If a PC fails a DC 5 or more by 5 or more points, trigger a minor alarm (a chime, wind) that makes stealth attempts harder for 1 round.
- Handling hazards: If someone steps off the glow path during a rotation, adjudicate the Dex save (DC 15) and apply 2d6 bludgeoning damage (halved on success). Decide in advance if you want knockback or prone on a failed save; keep it consistent throughout the encounter.
- Variants and scaling:
- To scale upward, increase hazard damage or add a secondary effect (e.g., “dust clouds blur vision” causing disadvantage on Perception checks for 1 round).
- To scale downward for lower-level parties, reduce DCs by 2–3, reduce hazard damage to 1d6, or reduce the number of rotations (e.g., only two rotations).
- Narrative flavor: Tie the clockwork theme to the party’s goals. The alcoves can yield a small clockwork component, a token etched with a date, or a temporary buff when the pattern alignment is perfect (DM’s discretion). Use ambient sounds: ticking, soft chimes, a hum from the central groove—these reinforce the clockwork motif as the trap cycles.
Encounter flow in one page
- Activation: Corridor’s clockwork runs continuously; rotations occur on rounds 3, 6, and 9.
- Detection: Perception 13–15, Investigation 15–17 to spot glow-path, ticking, alcove engravings.
- Disarm: Three alcoves; DC 20 tools or Sleight of Hand; DC 18–20 Arcana/Investigation to counter-timing; three successful DC 20 checks = 1 hour disable.
- Round 1–2: Idle; glow path present; no hazard unless stepping off path.
- Round 3: Rotation 1; path shifts; off-path PCs risk hazard (Dex save DC 15; 2d6 bludgeoning on fail).
- Round 4–5: Stabilize on new layout; glow path active.
- Round 6: Rotation 2; same hazards and path shifts.
- Round 7–8: Stabilize; clues may become clearer.
- Round 9: Rotation 3; final layout shift and hazard check.
- End if disarmed: Safe static path for 1 hour.
- End if not disarmed: Cycle ends; re-run possible or reset for future encounters.
This set of gameplay notes should help you run the Amber Clockwork Corridor as a vivid, multi-round, initiative-driven trap that rewards perception, timing, and teamwork. Adjust DCs and damages as needed to fit your party’s composition and power level, and use the clockwork ambience to heighten tension as the corridor breathes and reconfigures around the players.