
The Summoning Sphere
Complexity: Complex
Type: Magical
Severity: Dangerous
Trigger: Hidden switch disguised as a decorative stone
Effect: Summoning Effect
Damage Output: 1d8 necrotic damage (Necrotic)
Detection DC: Investigation DC 15, Perception DC 12
Disarm DC: Thieves’ Tools DC 15, Arcana DC 14
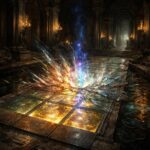
The atrium looms tall, framed with columns that speak of artistry long forgotten, their marble surfaces glistening with moisture, amid the quiet whisper of the creeping ivy. At the center sits a fountain, its waters still, betraying nothing of the secrets it conceals. Yet, beneath its surface, a pulsing energy simmers, hinting at the unnatural forces that protect this hallowed ground. When activated, the fountain erupts into life; a ghostly circle materializes, swirling with ethereal light. The air thickens with tension as a specter materializes from the depths of this sphere—a wraithlike figure eager to enforce the castle’s ancient sanctity. The space warps as shadowy waters begin to bubble violently around it, creating difficulties for any who would dare traverse its domain.
Gameplay Notes for The Summoning Sphere Trap
Trap Activation
- Trigger: The trap activates when a character interacts with the hidden switch disguised as a decorative stone at the base of the central fountain.
-
Conditions for Activation:
- Unintentional or deliberate activation upon physical contact with the switch.
- Successful Investigation (DC 15) lets players identify the switch as a potential trap trigger.
Detection and Disarm Notes
Detection
- Investigation Check (DC 15): A successful check reveals the soft, humming vibrations and an uneven texture of the hidden switch.
- Perception Check (DC 12): Success indicates an unnatural area around the fountain that feels fresher, suggesting lingering magical energy.
Disarm Mechanism
-
Disarming the Hidden Switch:
- Dexterity Check (DC 15 using Thieves’ Tools) to disengage the trap without activating it. This action could be taken before or while an encounter is occurring.
-
Identifying the Magic:
- Arcana Check (DC 14) allows spellcasters to weaken or nullify the trap’s effects entirely, rendering it inactive. The process takes one action, requiring concentration and possible spell slots depending on your campaign.
Suggested Tactics and Variations
Tactical Suggestions for the Specter:
- Targeting: The summoned specter targets the character who triggered the trap, then chooses the nearest character if that one is defeated. Encourage players to position themselves strategically to protect vulnerable allies.
- Spectral Behavior: The specter can attempt to flank players or work with them to force them into the difficult terrain surrounding the fountain.
- Summoned Aid: If the balance of battle seems too smooth for players, consider having additional, weaker creatures such as Shadows or Spooky Spirits arise from the fountain as reinforcements (one every 2 rounds).
Variations:
- Adjust the CR of the creature summoned based on party level, replacing the Specter with a stronger creature if needed, e.g., a Wraith for more advanced parties.
- Instead of a direct combat creature, summon a creature that could control the battlefield in a unique way, like a Fomorian or a Bone Naga, depending on your campaign’s theme.
Initiative and Round Actions
Trap Initiative
- Initiative Bonus: +2 (roll a d20 +2), determined at the start of the encounter.
- Specter Actions: The summoning of a Specter begins combat immediately, with the specter acting on the trap’s initiative score.
Round Actions
-
Round 1:
- Initial Summoning: The circle activates, and the specter appears, using its multiattack to attack the nearest party member.
- Environmental Effect: The bubbling fountain creates difficult terrain in a 10-foot radius, impacting movement.
-
Round 2:
- Specter Actions: Attacks with its melee touch (against the character directly in front of it) +4 to hit, dealing 1d8 necrotic damage.
- Frightening Presence effect is triggered (DC 12 Wisdom save), applying the frightened condition on failure.
-
Round 3:
- Environment becomes darker, lowering visibility (dim light spreads 15 feet from the fountain). Spot Save DC 10 to avoid losing sight of the specter.
- If players have not neutralized the trap, an additional specter or shadow creature emerges from the fountain.
-
Round 4 and onward:
- Escalating Effects: If the summoner is still active at Round 4, the dim light turns to darkness (total darkness in the difficult terrain).
- Increase the number of attacked characters as the specters coordinate their movements.
Round-by-Round Effects
- Phase 1 (Round 1): Initial summoning and attack on party members.
- Phase 2 (Rounds 2-3): Environmental hinderance (difficult terrain, frightened condition).
- Phase 3 (Round 4 and beyond): Introduce additional creatures, dimming light, and increasing chaos, making the fountain erupt with spectral energy that deals rolling necrotic damage equal to 1d4 per round spent in the area.
Tips for Running This Trap Smoothly
- Track Initiative: Use a clear tracking sheet for the players and the summoned specters, managing health and status conditions clearly to avoid confusion.
- Flow of Combat: Keep the pace of the encounter up by reminding players about action economy and each character’s effects.
- Encourage Creativity: Allow players to use environmental advantages to interact with the fountain, whether through water spells or use of light sources, and reward them creatively.
- Dramatic Flair: Describe the atmosphere vividly; the flickering inscriptions on the walls could pulse with energy as the trap triggers, creating a tense scene.
By establishing these notes, the Dungeon Master can run the Summoning Sphere trap effectively, creating a memorable and challenging encounter for the players within the iconic setting of the castle atrium.